*This post contains affiliate links. That means that when you click on one of my links and make a purchase I receive a small commission.
Heading to the Adirondack High Peaks region of New York State? Interested in peak bagging or just want to challenge yourself with New York’s highest peaks? Though the tallest mountain is Mount Marcy, getting to the summit of Algonquin peak will push you to the limit.
Algonquin is New York’s second tallest mountain, towering over the area at 5,115 feet, with 3,651 feet of total elevation gain. It’s not a causal day hike but a steep climb that requires an early start.
When planning your hike, you have several options. This guide will help you with your goal to reach Algonquin summit, and maybe a few others while you’re at it.
General information
Height
Like I said the mountain is 5,115 feet. It is very possible to hike to the summit and back in one day, though, depending on your choice of route, it will be a long and fairly tough day.
Location
Though there are many options within the High Peaks region, especially if you are planning a multiday backcountry trip, to get to Algonquin Peak, this is my recommendation. For the two routes I describe below you will start at the Adirondack Loj and Heart Lake Program Center (1002 Adirondack Loj Rd, Lake Placid, NY 12946).
My phone did not take me all the way there with this address but if you follow the road to the end there will be a toll booth and there is a big parking lot on your left (the hiker’s parking lot). That’s where you can park for $15/day for nonmembers (members pay $7).
Hiker numbers
Adirondack state park itself sees over 12 million visitors each year and this is a popular trail. Even though this is a 6-million-acre park, that number is still pretty significant. Of those that come, 85% come to hike. Other activities, in case you are wondering, include kayaking, fishing, recreating on the various lakes, and more.
The Adirondack Loj has seen a surge in visitors over the past several years with close to 60,000 visitors registered at this location in 2016. That’s from around 35,000 in 2005, and the numbers continue to grow.
However, all is not lost, you just need to pick you battles. When I went in September (granted it was also during COVID) the parking lot was still pretty packed on the weekend but the hiker’s appeared few and far between.
So, you can still find solitude in the High Peaks region. Just remember that the High Peaks wilderness makes up 275,460-acres, the largest unit in the park.

Trail options to Algonquin Peak
Starting at the Adirondack Loj area at the hiker parking lot.
Out and back from Adirondack Loj
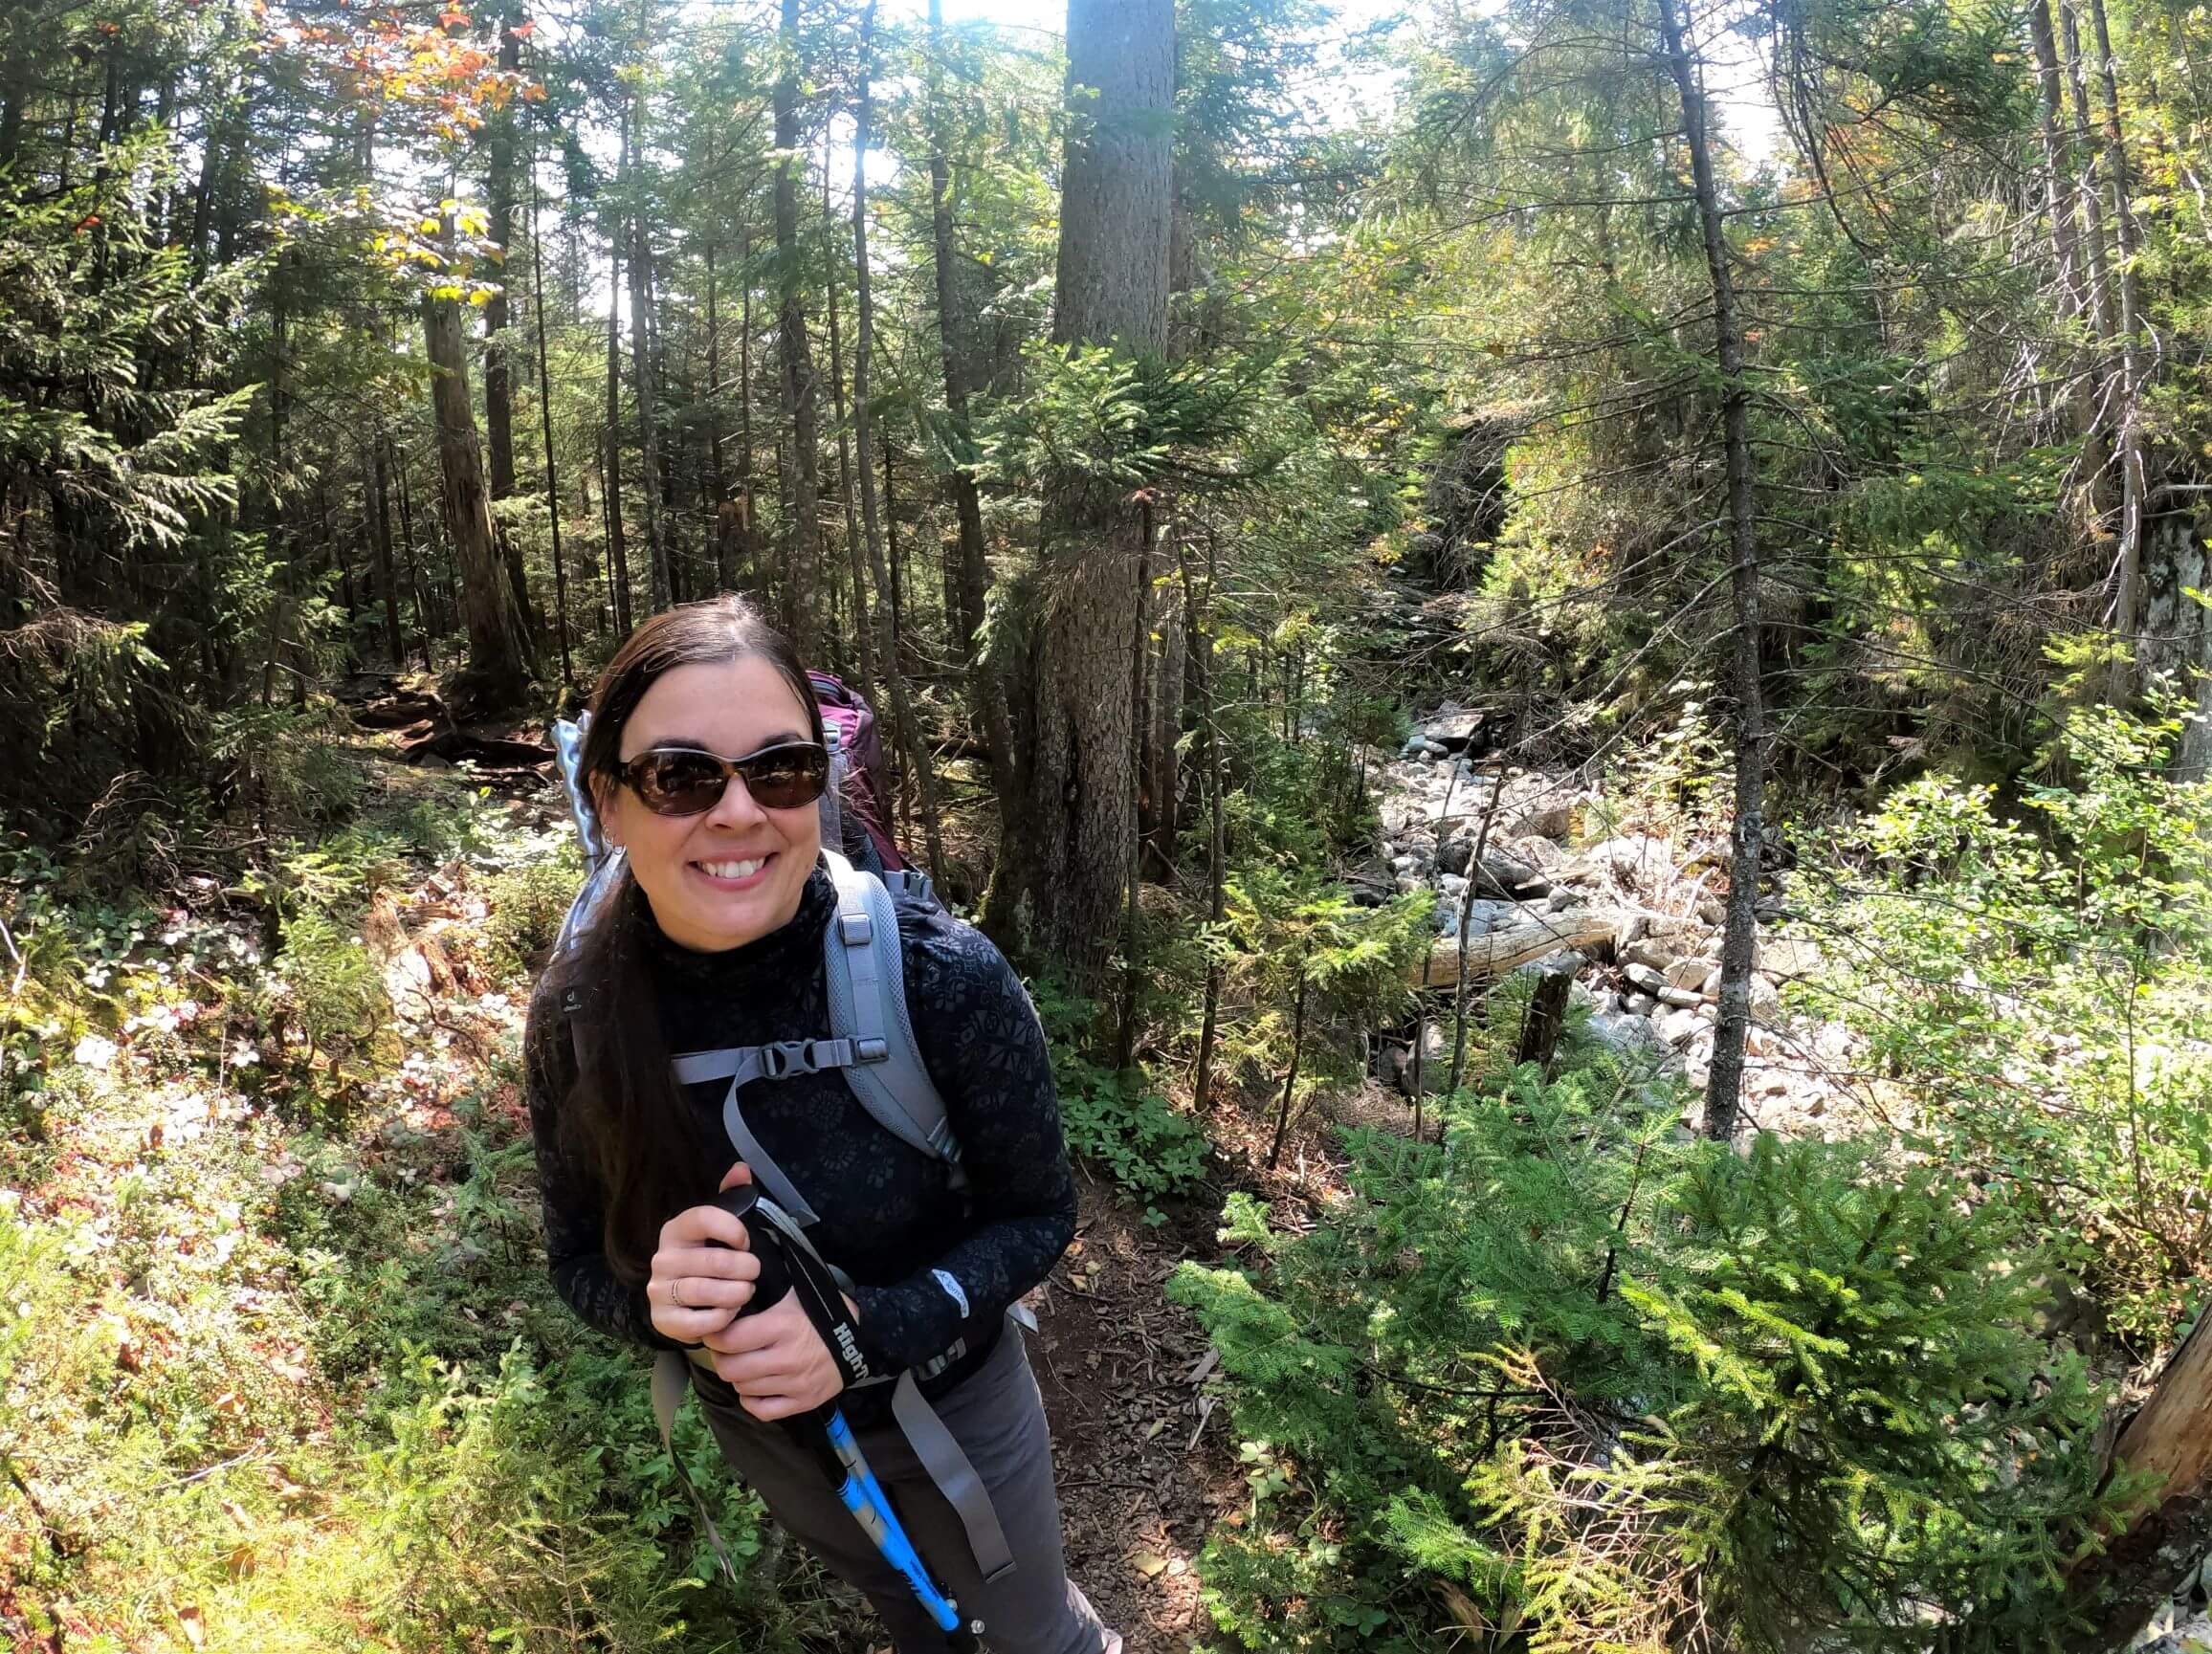
You could do an out and back, taking the 4.6-mile (one way) Algonquin Trail to Algonquin Peak. It’s fairly rocky for the majority of this hike, with some bouldering as you get closer to the summit. This is the easiest option and shortest route.
The loop trail from Adirondack Loj to Algonquin Peak via the Avalanche Pass trail
This is my personal recommendation.
Also, starting from the hiker parking lot this one is a loop. It’s quite a bit longer, roughly 13 miles in total. It begins with the hike to Marcy Dam, a flat and pretty hike where you will see lots of other hikers before heading to Avalanche Lake.
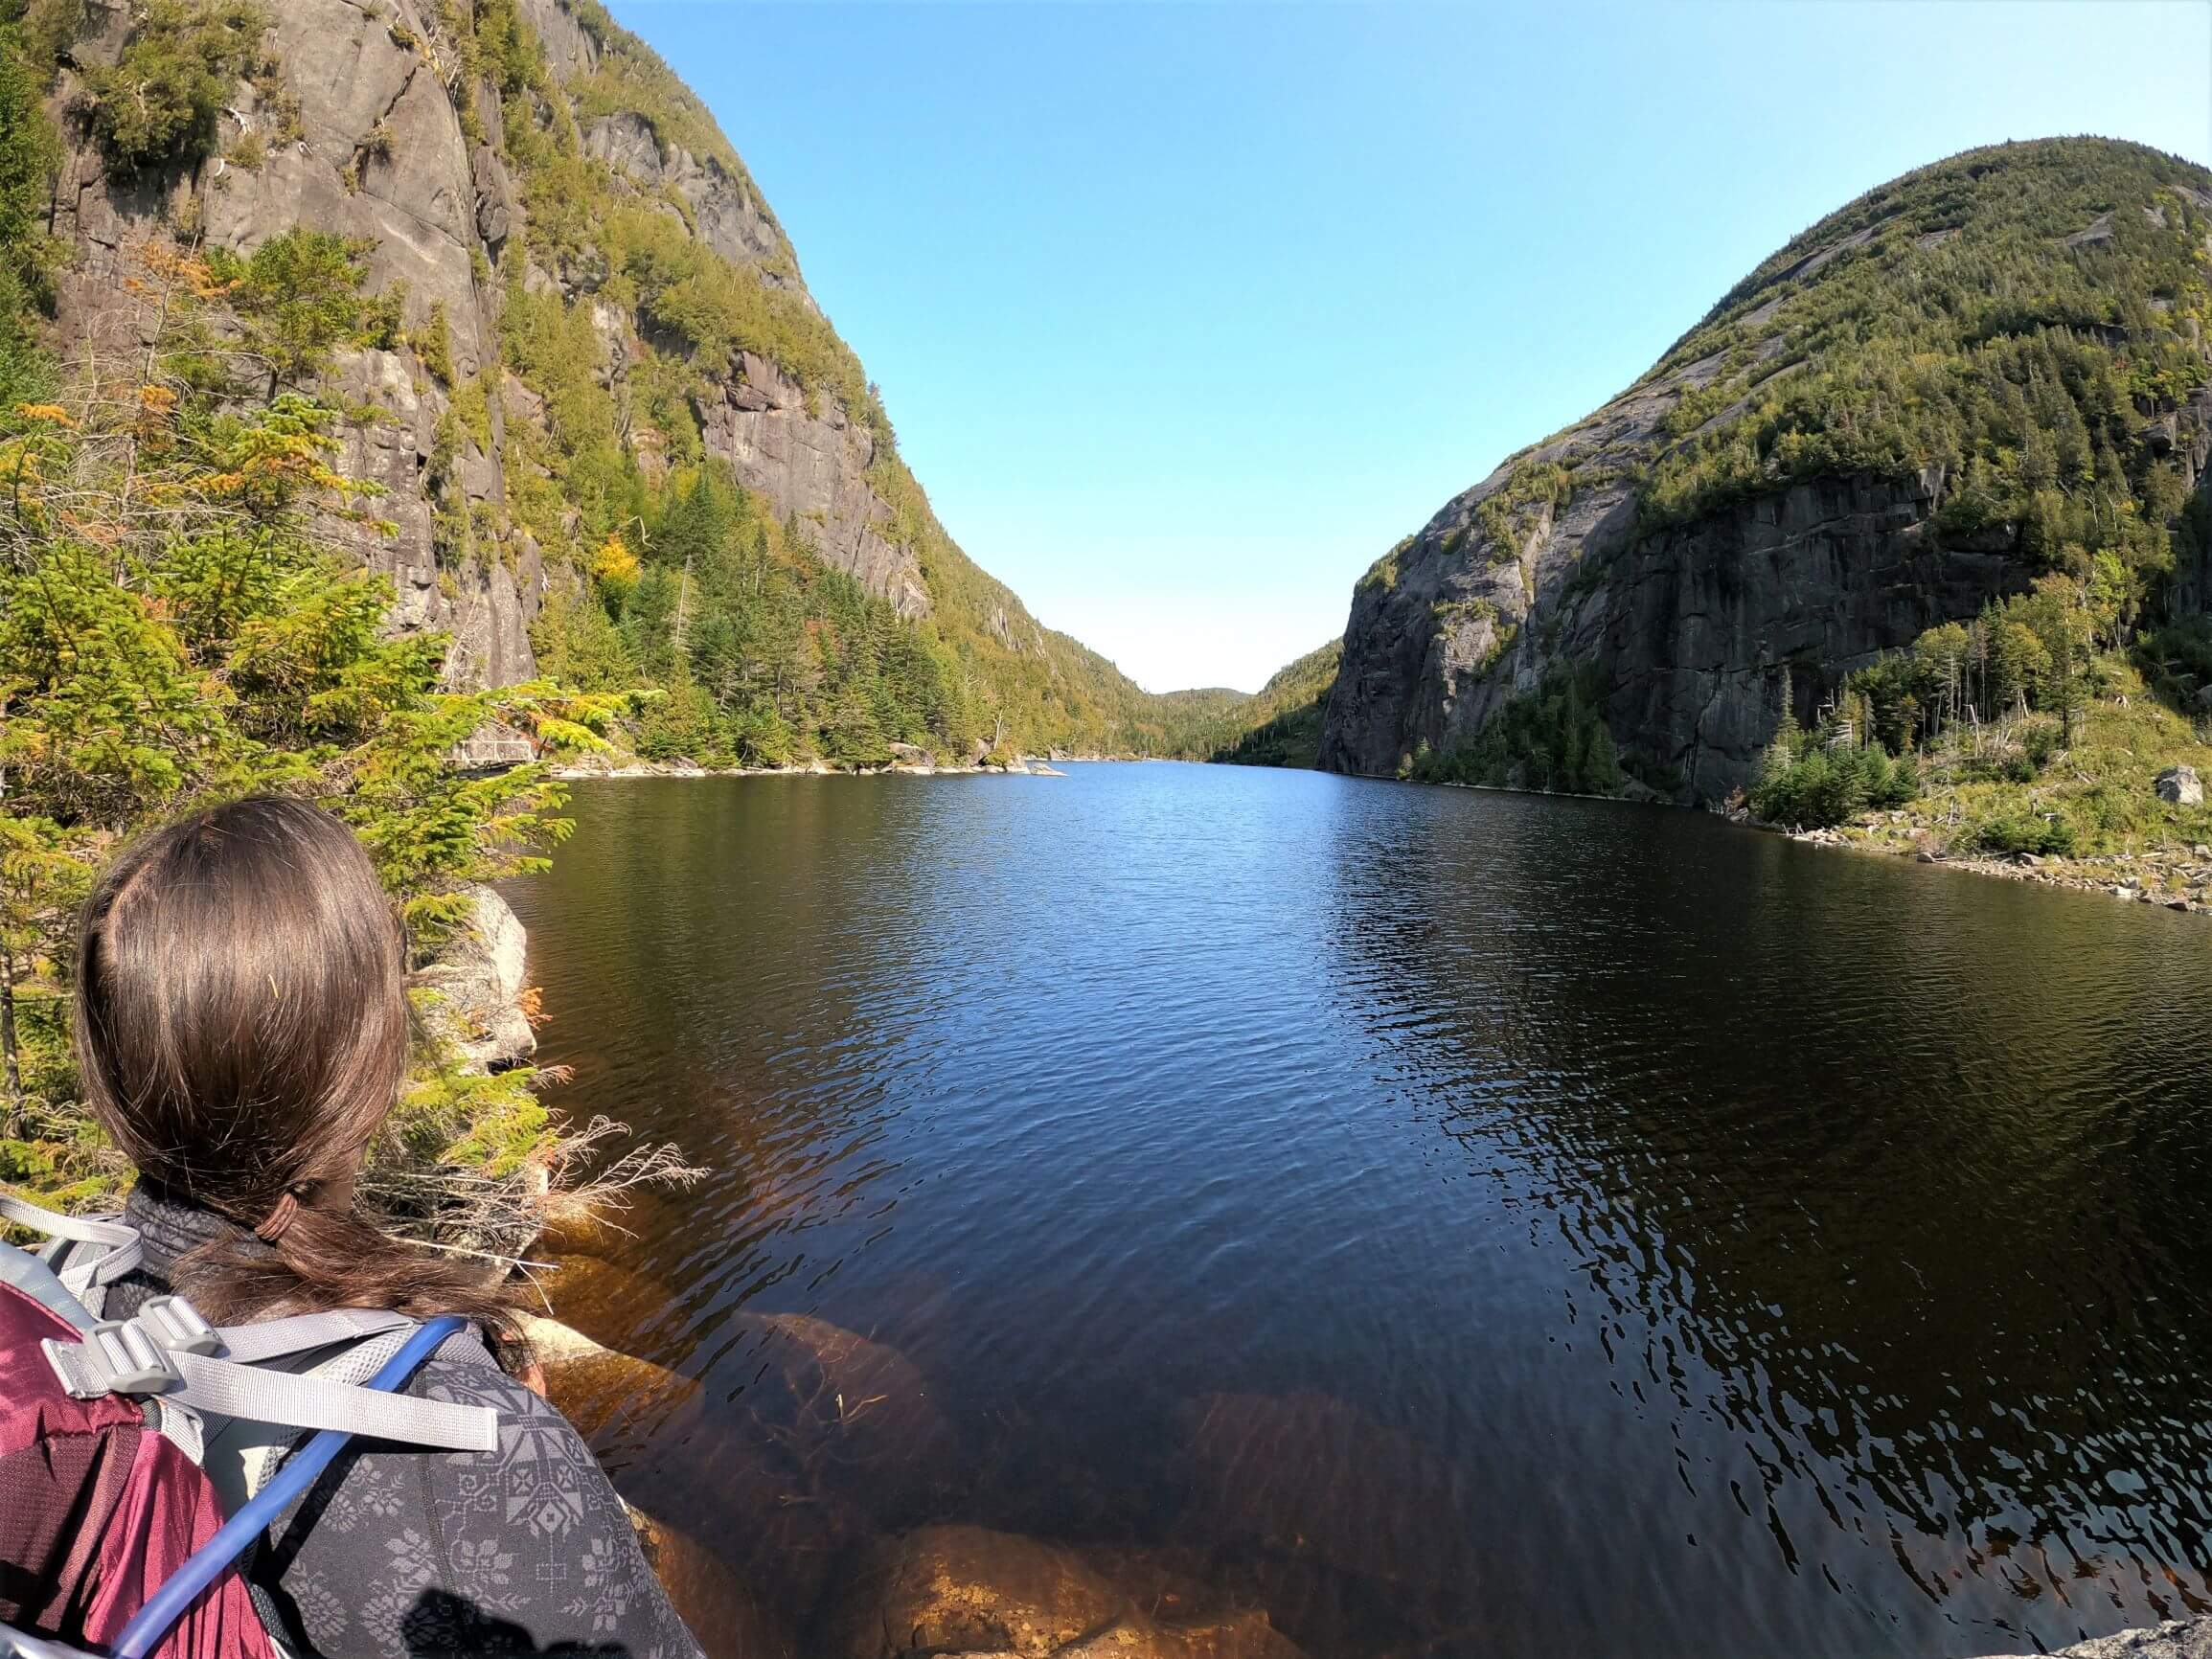
If you are planning to do the loop, I recommend doing it in this direction while your legs are the freshest at the beginning. The hike past Avalanche Lake through Avalanche Pass is why I recommend this route. This was a very cool, somewhat technical section of the trail.
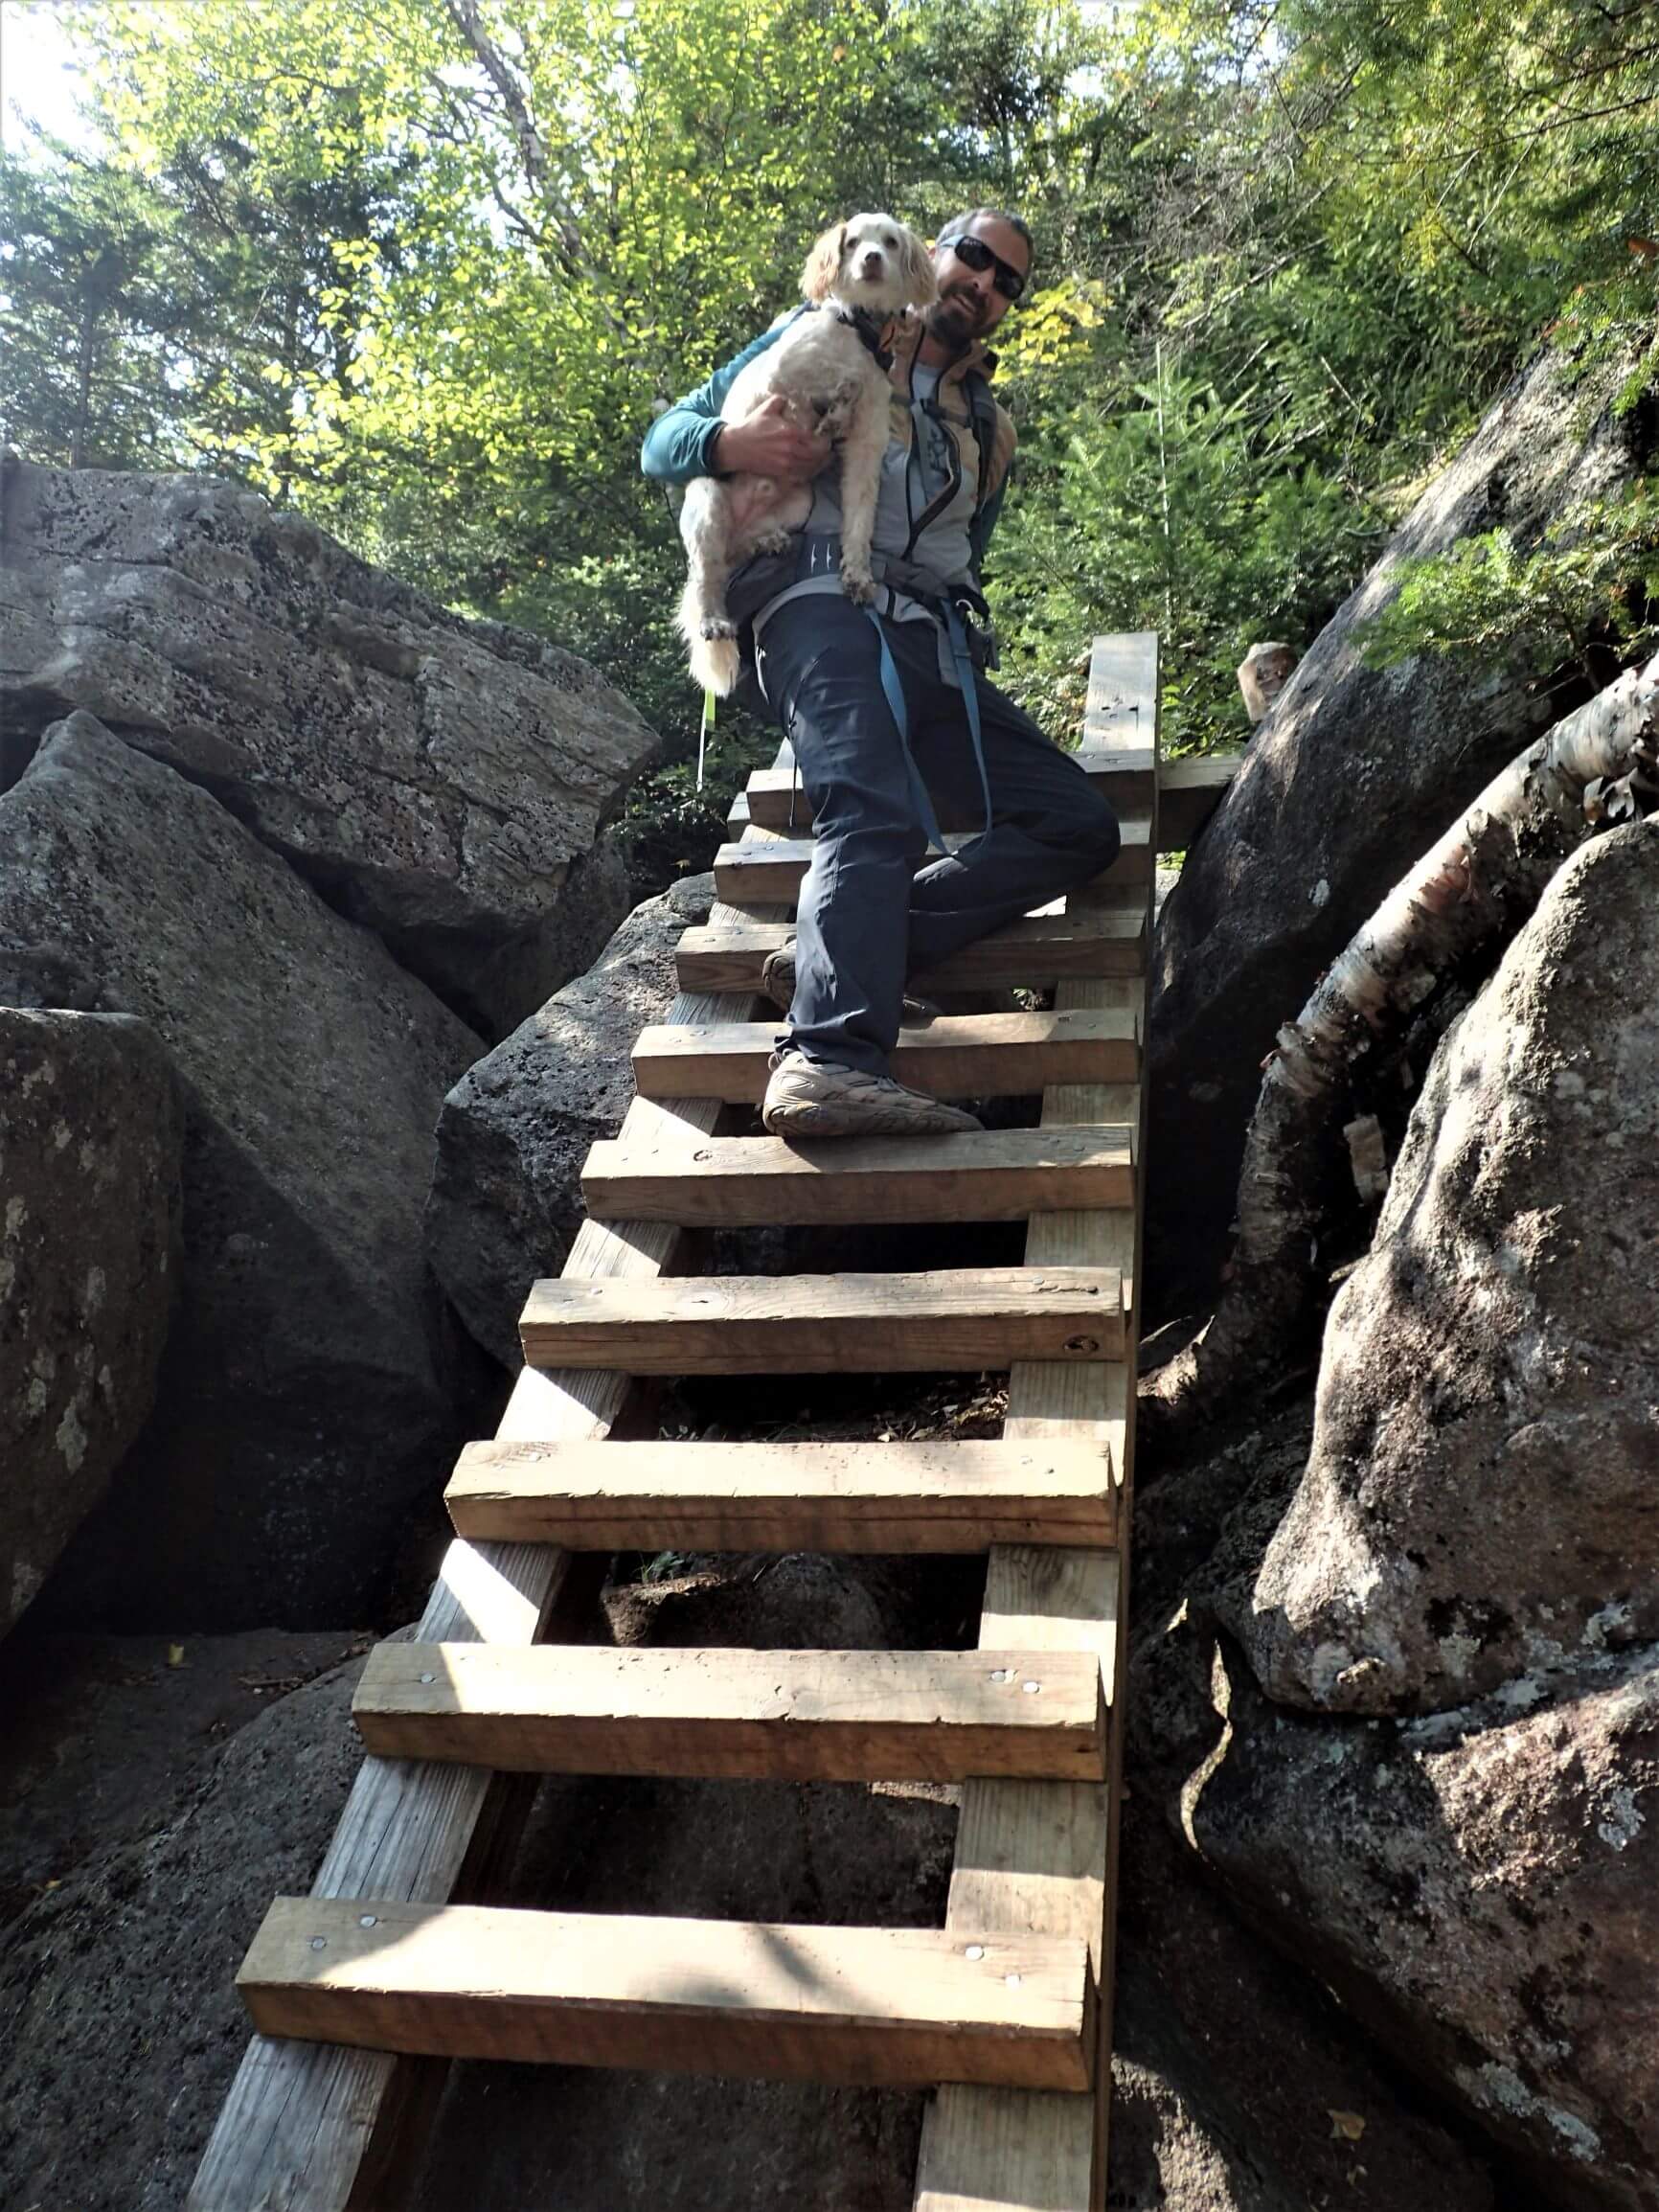
The lake itself is stunning with sweeping cliffs surrounding the serene, blue lake. There is some boulder climbing, ladders, and boardwalks situated directly over the lake, skirting the edge, hugging the cliffs. It’s spectacular.
From there you disappear back into the woods and begin your ascent to Algonquin Peak. This is where things get really challenging. The remainder of the trek is all boulders with some slick rock and scrambling. It will kick your ass if you’re not ready for it.
Hell, I was ready for it and it still kicked my ass.
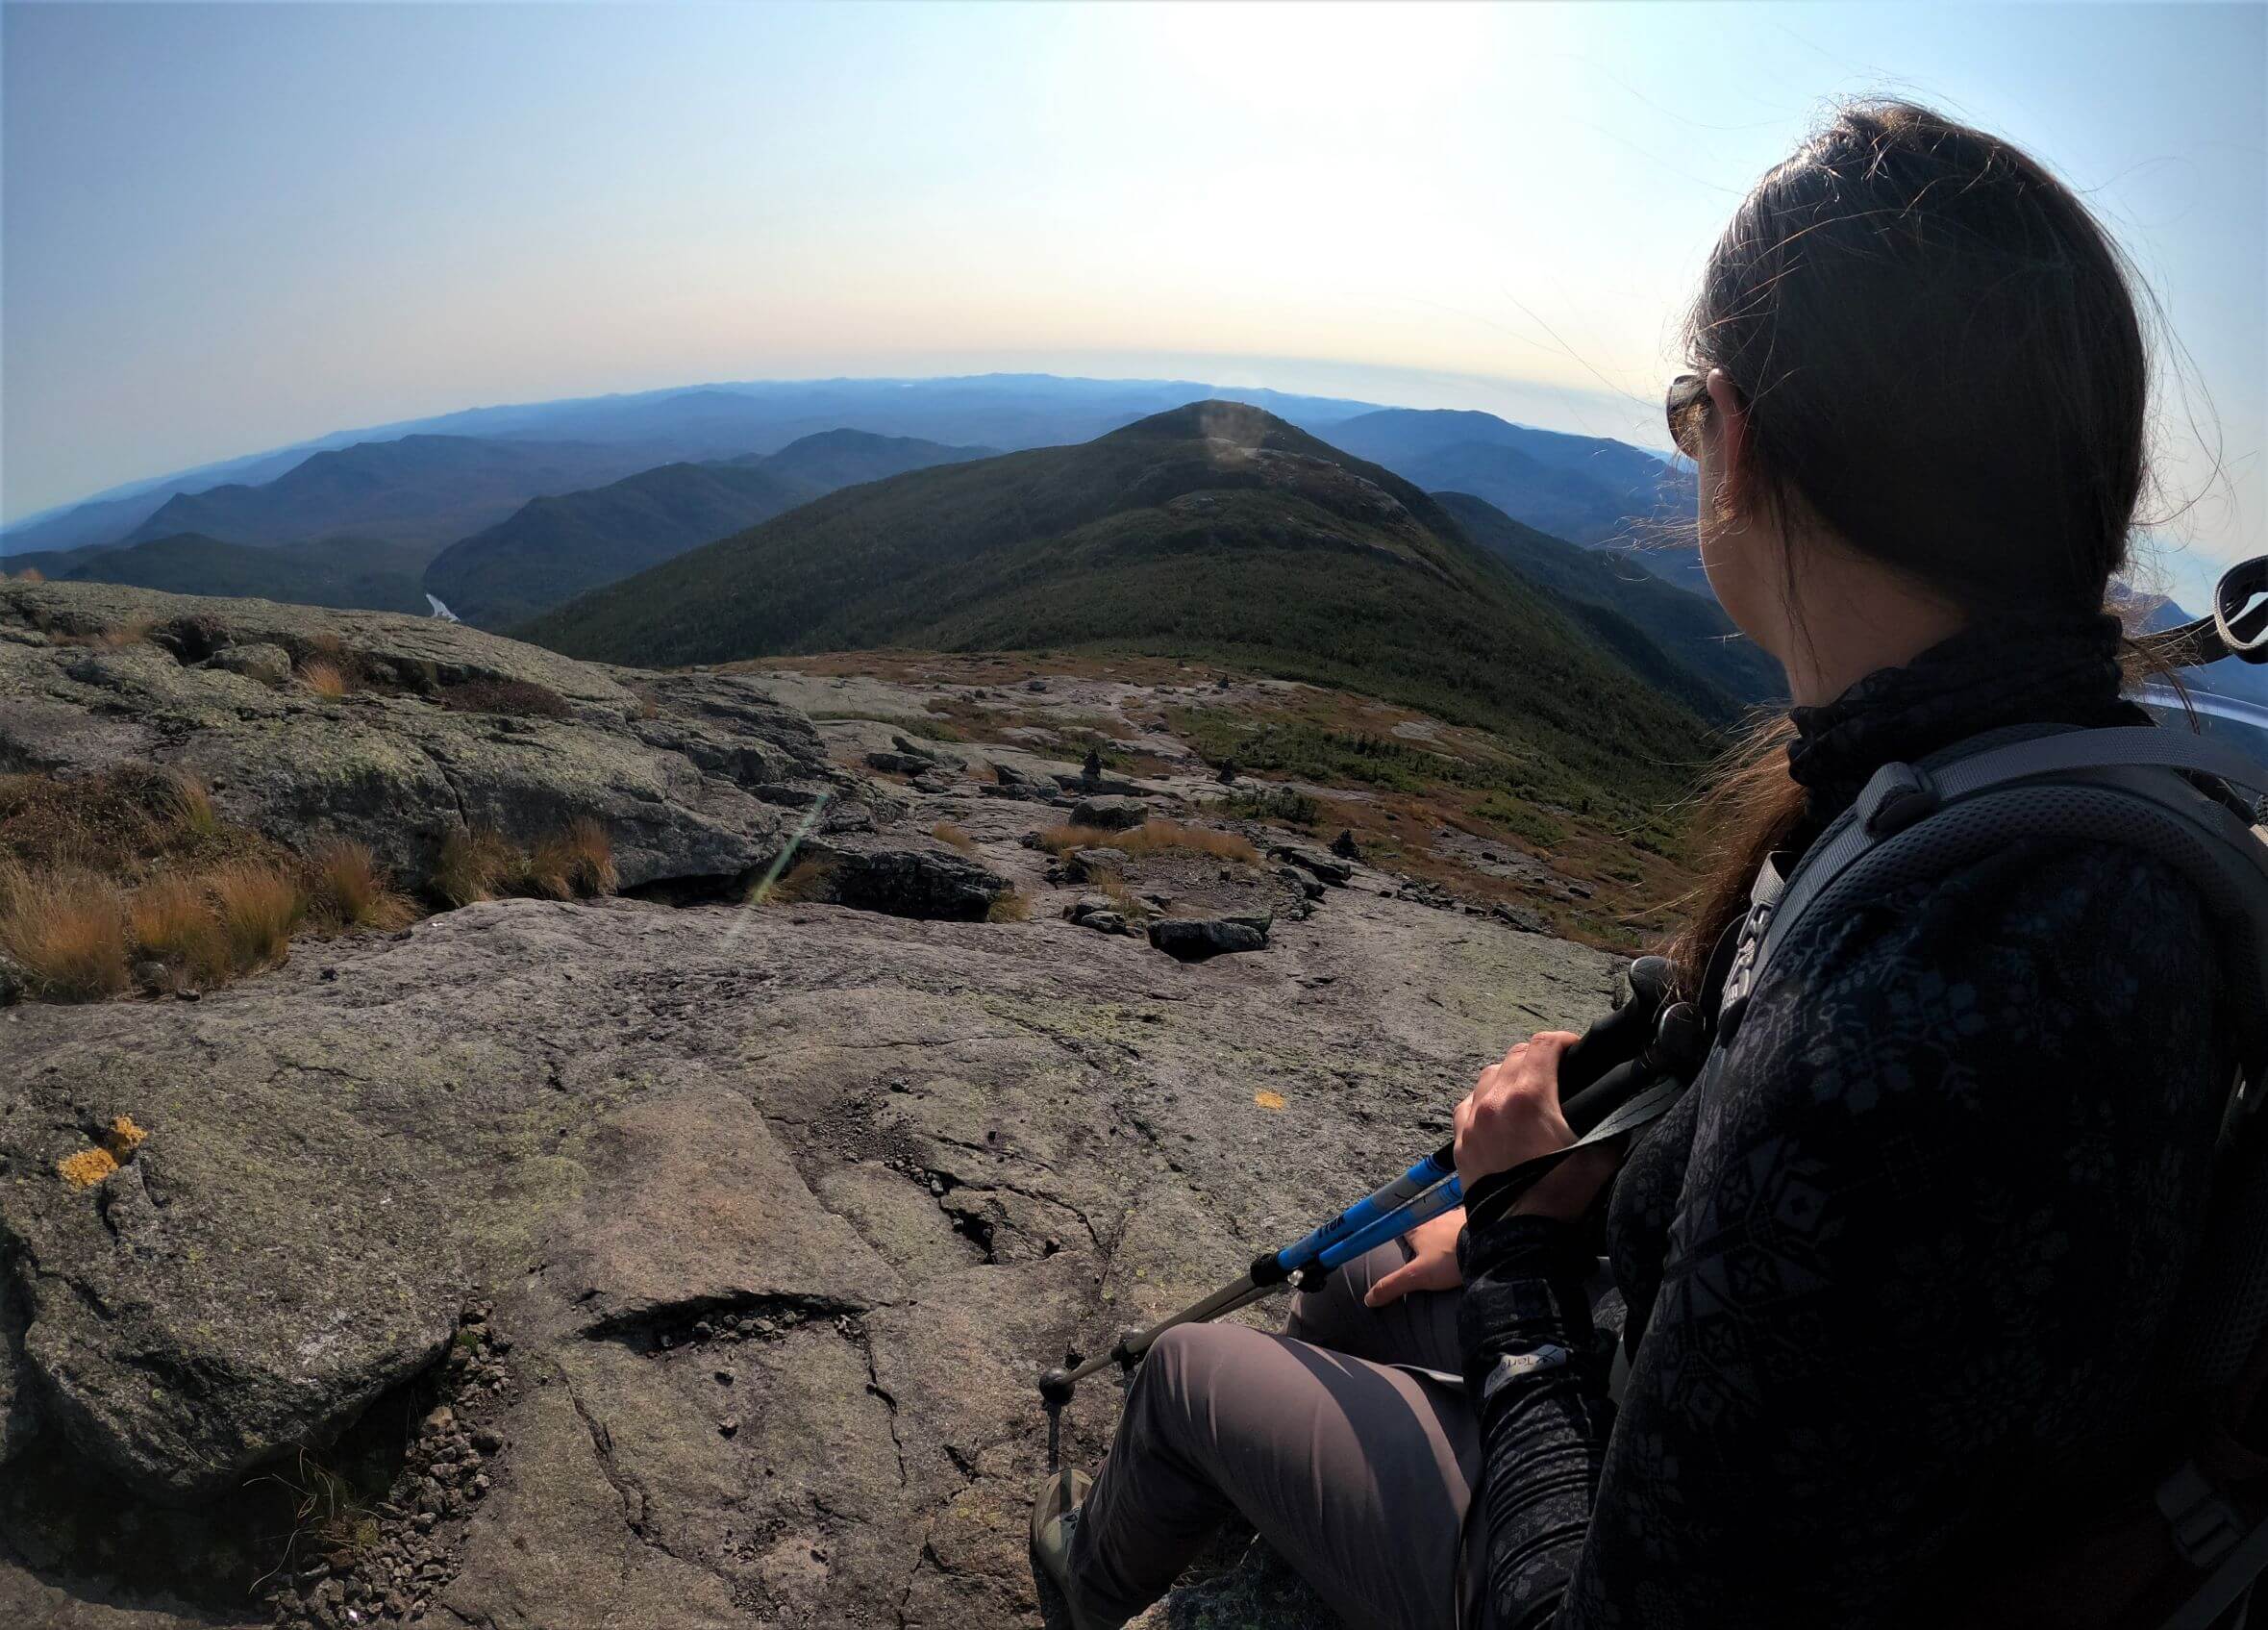
At some point you begin to wonder if you will ever make it to the top. But just as suddenly you break through the tree line as the trees become shorter and crowd in around you before spitting you out onto the side of the mountain, and the world just falls away.
Here you have a choice. Iroquois Peak is also here. So, if you are into peak bagging, this is one of the 46 high peaks. It’s an extra 0.6 miles (one way) to the peak so if your legs are getting ready to give out or your short on time you could skip it. I skipped it due to, well, both of those reasons honestly.
From there it’s fairly flat rocks with a gradual incline to the top.
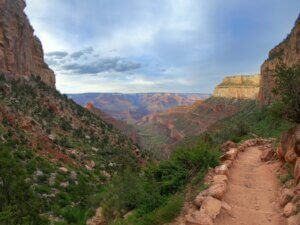
Algonquin Peak certainly delivers on the views, making the struggle totally worth it. It’s a complete 360-degree view, showing off the High Peaks in all their glory along with Lake Placid and Heart Lake. Perfection.
Once you have taken in those views and are ready to head out you can continue on the trail to that 4.6-mile stretch that I mentioned in the shorter option above. With another peak bagging option on your way (more on that below).
Peak possibilities
Hiking to Algonquin Peak, no matter which way you opt to go about it, gives you the opportunity to summit a couple other peaks as I mentioned above.
Iroquois Peak
As I said, this is an additional 0.6-miles, one way, to add onto your trek. If you are doing the 4.6-mile out and back, this shouldn’t be a problem.
Iroquois Peak is 4,840 ft high with an ascent of 2,661 ft. You can follow the Algonquin Trail and then after summiting Algonquin Peak continue on to the herd path to Iroquois Peak.
That’s two high peaks bagged in one day.
Wright Peak
Considered one of the easier of the 46 high peaks, Wright Peak is another side option when hiking the Algonquin Trail to Algonquin Peak.
The elevation is 4,580-ft with a 2,400-ft ascent. There is also a plaque at the peak representing a plane crash from 1962 and people still find debris there.
Gear to consider
These are just a couple of things to consider, it is not an all-inclusive list.
Day Hiking to Algonquin Peak
Make sure to bring plenty of water. I had a camelback and a water bottle and I ran out close to the end of the trek. There are areas along the way where you could get water if you have a good filtration system with you.
Energy rich snacks: if you are taking the long way around make sure to pack some good energy boosting snacks. Peanut butter, granola bars, dried fruit, and jerky tend to be my go-to’s.
Extra clothing: the weather at the top of these mountains can change on a dime. Check the weather forecast before heading out but make sure to pack an extra layer just in case. A good waterproof jacket can make all the difference.
Hiking poles: the terrain is rocky and a sturdy set of hiking poles will save your knees. I also use them because it keeps my hands from swelling. Trekking poles can honestly really make a hike and I never go without them.
And always make sure to check the weather conditions before you head out. Mountains create their own weather, so be prepared.
Overnight plans
This area has a ton of lean-tos that are first-come-first-serve, so keep in mind that you might not get a space in the lean-to. So, that being said, having a good light weight tent on hand is a necessity. Or even a hammock (which can be even lighter). The Adirondack Mountain Club allows you to book some camping and to rent bear canisters.
Bear canister: in this area a bear canister is a requirement, not a suggestion. If you don’t own a bear canister you can rent one from the Adirondack Information Center ($5 for 1-2 nights; $10 for 3-4 nights) before heading out. Make sure to put all your food and toiletries in the canister and keep it about 100 feet away from the campsite (as per the DEC’s recommendations).
Canister stove: there are no fires allowed in this region, so having a cannister stove is a must if you want a hot meal or coffee in the morning. MSR’s PocketRocket is the top ranked in cannister stoves. I personally have an OLICAMP Ion Micro Titanium Stove and am very happy with how well it works.
Headlamp: when the sun goes down it gets more than a little dark out, so for those late-night trips to the toilet (and some areas do have out houses) a headlamp is a must.
Sleeping bag and pad: regardless if you are staying in a tent or one of the lean-tos, having a light-weight sleeping bag with a high R rating (for warmth) and a comfortable sleeping pad will help make those overworked muscles relax and heal. My top recommendation is the Big Agnes Torchlight UL sleeping bag (best sleeping bag I ever bought and completely worth the cost) and the KLYMIT INSULATED STATIC V Sleeping Pad. This way you are covered whether it’s mid-summer or late fall.
Concluding Thoughts
If peak bagging is what you are there to do, taking Algonquin Trail instead of the round trip by Avalanche Lake will bag you three of the 46 high peaks in one go because it is shorter, making it more likely you will have a successful summit.
But, honestly, I feel like you’re missing out by passing on Avalanche Lake because it’s such a cool experience. That being said, the High Peaks region has so many trails that are interconnected that if you make it a multiday excursion you could have the best of both worlds. Or take a lesser known trail, like the Indian Pass Trail, to get away from the crowds and the peak baggers altogether.


Comments
Very helpful. I plan to make this hike next week.
Author
Awesome! I hope you have a good hike, let me know how it goes!